
Packing for a Two-Week Trip in a 40-Litre Backpack

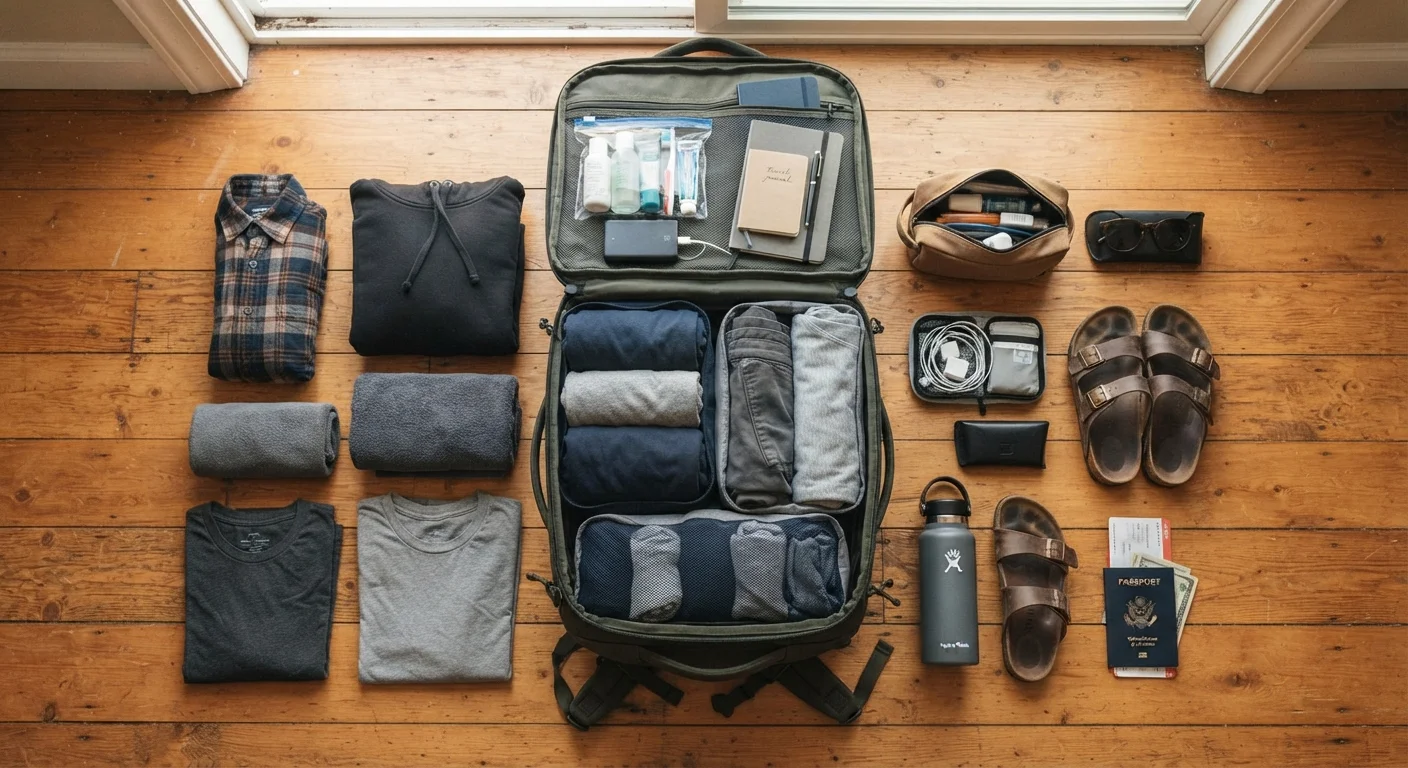
A step-by-step walkthrough of building a functional, versatile two-week packing list that fits inside a standard 40-litre travel backpack.
Key takeaways
- A 40-litre backpack can realistically hold two weeks of clothing and gear when you plan around a laundry strategy.
- Packing cubes let you compress and organize clothing without re-folding your whole bag every day.
- Shoes take the most volume; limiting yourself to two pairs frees space for everything else.
- Toiletries in containers under 100 ml and a minimal tech kit are the two areas where most space is wasted.
- Building your list by category before you pack prevents the common mistake of duplicating items.
Why 40 litres works for two weeks
A 40-litre backpack sits at the practical upper limit for most airline carry-on policies, which means you can travel for two weeks without checking a bag. That matters for trip pace: you move through airports faster, avoid baggage claim wait times, and have your gear with you if a flight is delayed or rerouted.
The math works because two weeks of travel does not require two weeks of clean clothing. One mid-trip laundry session, whether at a hostel, a coin laundry, or a hotel sink, resets your supply. If you are weighing whether a backpack is right for your particular itinerary at all, the comparison between backpacks and rolling suitcases covers when a wheeled bag makes more sense.
The constraint is the point. When the bag has a fixed volume, every item you add displaces something else. That pressure produces better decisions than an open-ended packing session.
Packing cubes
Compress and separate clothing categories so the bag stays organized throughout the trip.
Luggage scale
Verify total pack weight before leaving home to avoid airline overweight fees.
Compression stuff sack
Reduces the packed volume of a jacket or puffy layer that would otherwise take up a third of the bag.
Clear TSA-compliant liquids bag
Required for carrying liquids through airport security on international flights.
Building your list and loading the bag
The steps below walk through the full process, from auditing your itinerary to doing a final weight check. If you are new to structured packing or want to understand the underlying concepts before you start, the introduction to packing and gear covers bag types, organizers, and foundational decisions.
Audit your destination's climate and planned activities
Before touching a single item, write down the temperature range and weather pattern for every stop on your itinerary. A two-week trip that spans a beach and a mountain requires a different strategy than one confined to a single city. Note any formal dinners, hikes, or work meetings that demand specific clothing, and count those as fixed items. Everything else in your list is negotiable.
Write a category list before pulling anything from your closet
Divide your list into these categories: bottoms, tops, underlayers, outer layer, footwear, sleepwear, toiletries, tech and cables, documents and wallet, and one miscellaneous slot. Assign a number to each category before you handle any gear. This prevents the most common packing error, which is grabbing items first and rationalizing the count afterward.
A practical baseline for a temperate two-week trip: 2 bottoms, 4 to 5 tops, 7 pairs of socks and underwear, 1 outer layer, 2 pairs of shoes. Plan on doing laundry once, midway through the trip.
Select and lay out every item before it enters the bag
Place all candidate items on a flat surface. Check each one against your category list. If an item does not belong to a category, it does not go in the bag. Look for items that serve more than one activity: a neutral-colored merino wool top worn at dinner and on a day hike uses one slot instead of two. Remove any item you added "just in case" unless a specific planned event requires it.
Pack the bag in the correct loading order
Load items in this sequence: heaviest items (shoes, tech kit, toiletry bag) at the bottom closest to your back, clothing cubes in the middle, and the outer layer or anything you may need during transit at the top or in a hip-belt pocket. Keeping weight centered and close to your spine makes the pack easier to carry for long stretches.
Stuff socks inside shoes to recover that hollow space. Roll softer items like t-shirts to fill gaps between rigid objects rather than folding them flat.
Weigh the packed bag and do a zipper test
Lift the pack and check that all zippers close without force. Then weigh it. A 40-litre pack loaded for two weeks typically lands between 7 and 12 kg (15 to 26 lb) depending on footwear and tech. If it exceeds your airline's carry-on weight limit, remove items from the heaviest category first, which is usually shoes or toiletries.
Put the pack on and walk around for two minutes. Adjust the shoulder straps and hip belt. If the pack pulls backward or sits unevenly, redistribute weight before you leave home rather than mid-trip.
For a broader look at what you actually gain and lose when you commit to packing light, the trade-offs between packing light and packing everything offers a balanced view. If your trip involves cold weather, the layering logic for extreme cold explains how to handle insulation without filling the bag.
Common problem areas and how to handle them
Toiletries are where most packers lose 1 to 2 liters of space unnecessarily. Decant shampoo, conditioner, and any liquid product into containers sized to your actual trip length, not to the largest container that fits the liquid rule. Many two-week destinations have pharmacies where you can resupply basics; check before leaving home rather than assuming you must carry everything.
Tech cables accumulate fast. Audit every cable against the actual devices in your bag. If a device is not in the bag, its cable is not either. A single multi-port USB-C charger with one cable can power most phones, tablets, and laptops; confirm your devices' charging ports before you swap out a cable you actually need.
For international travel, the pre-trip checklist for international travel covers documents, health supplies, and adapters in a format you can work through before departure.
Treat your packing list as a document
Save your final category list and item counts after your first trip. Each trip you take will produce small corrections: an item you never used, a gap you had to fill locally. A running list turns into a reliable personal baseline far faster than starting from scratch each time.
The content on this site is for informational purposes only and is not a substitute for professional advice. Always consult a qualified professional for guidance specific to your situation.