
Checking and Topping Up Your Coolant Without Getting It Wrong

Coolant keeps your engine from overheating, yet it is one of the most neglected fluids. Learn the safe, correct way to inspect and refill it.
Key takeaways
- Never open the radiator cap or reservoir cap on a hot engine; wait at least 30 minutes after driving.
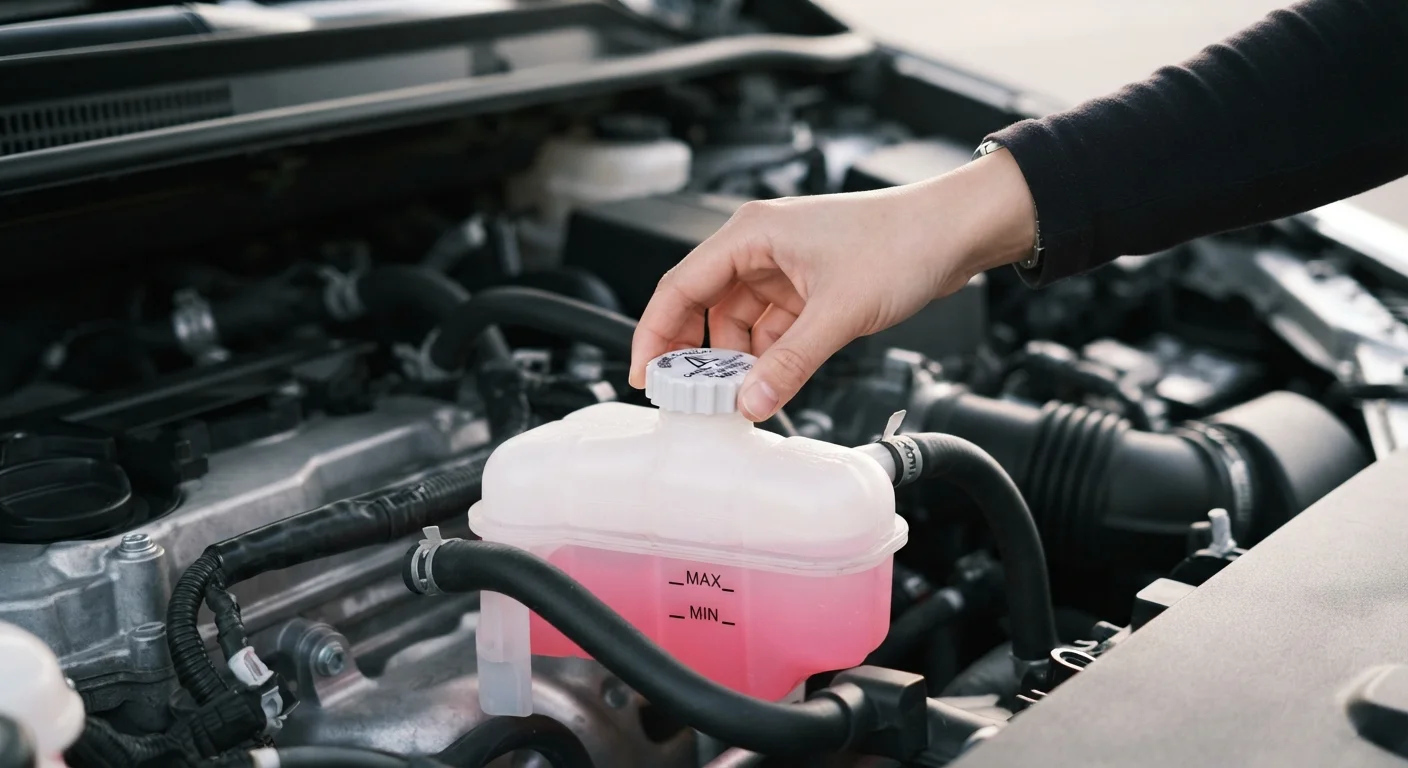
- Check the coolant level against the MIN and MAX markings on the translucent reservoir, not the radiator itself.
- Always use the coolant type specified in your owner's manual; mixing incompatible types can cause damage.
- A consistently low level after topping up signals a leak that a qualified mechanic should inspect.
- Coolant also contains antifreeze and corrosion inhibitors, so its condition matters, not just its level.
Why coolant deserves more attention than it gets
Engine coolant does two jobs most drivers do not think about until something goes wrong. It carries heat away from the engine block to the radiator, and it contains inhibitors that prevent corrosion inside metal passages and hoses. Without adequate coolant, an engine can overheat within minutes of driving, and the repair bills for a warped cylinder head or blown head gasket can run into thousands of dollars.
Coolant also functions as antifreeze. The ethylene glycol base lowers the freezing point of the fluid so it does not turn solid in winter, and raises its boiling point so it stays liquid in summer heat. These properties degrade over time as the inhibitors break down, which is why a full coolant flush is typically recommended every two to five years depending on the vehicle and coolant type. For the full picture of how temperature extremes affect your car's fluids, see how heat and cold affect your car's fluids, battery, and tyres.
Checking the coolant level takes under five minutes and costs nothing. Adding it to a regular inspection habit, alongside the checks covered in the consolidated fluid checks guide, is one of the simplest ways to protect a major investment.
What you need before you start
Gather your materials before opening the hood. Having everything within reach prevents you from leaving the engine bay mid-task.
What you will need
Approved coolant or premixed coolant
Used to refill the reservoir to the correct level; must match the specification in your owner's manual.
Distilled water
Required if topping up with concentrated coolant that needs dilution; tap water contains minerals that can cause scale buildup.
Clean cloth or paper towels
For wiping the reservoir cap area and cleaning up any spills safely.
Flashlight
Helps you read the MIN and MAX markings on the reservoir clearly, especially in dim engine bays.
Coolant tester or test strips
Measures the freeze point and condition of the coolant to determine whether a full flush is needed.
If this check is part of a pre-trip inspection, you can fit it alongside other walk-around checks described in the pre-trip vehicle check guide.
How to check and top up your coolant
Never open a hot cooling system
When the engine is hot, coolant is under pressure and can be superheated above 212 degrees Fahrenheit. Opening the radiator cap or reservoir cap on a hot engine can cause scalding fluid and steam to erupt instantly. Always wait at least 30 minutes after switching off the engine before touching any part of the cooling system.
Let the engine cool completely
Park on a level surface and turn off the engine. Wait a minimum of 30 minutes. The cooling system holds pressurized fluid even after the temperature gauge drops, so patience here is not optional. If the upper radiator hose feels firm or hot to a brief touch through a cloth, continue waiting.
Locate the coolant reservoir
Open the hood and look for a translucent plastic tank, usually white or light grey, connected to the radiator by a hose. It will have a colored cap, often yellow or black, marked with a radiator or snowflake symbol. The reservoir is distinct from the radiator itself. Most routine checks and top-ups happen at the reservoir, not the radiator cap.
Check the fluid level against the markings
Look at the side of the translucent reservoir. You will see two lines marked MIN and MAX (sometimes LOW and FULL). With the engine cold, the coolant level should sit between those two marks, ideally closer to MAX. If the fluid is below MIN, a top-up is needed. Note the color as well: healthy coolant is typically bright green, orange, pink, or blue depending on type. Brown, rusty, or oily-looking coolant signals degradation and warrants a full flush by a mechanic.
Select the correct coolant
Check your owner's manual for the approved coolant specification. Premixed coolant (already diluted to roughly 50/50 with distilled water) is the simplest option for top-ups. If you buy concentrated coolant, mix it with distilled water in the ratio specified on the label, typically 50 parts coolant to 50 parts water, which protects down to about minus 34 degrees Fahrenheit. Never use tap water for mixing; its mineral content promotes scale and corrosion inside the cooling system.
Add coolant slowly to the reservoir
Twist the reservoir cap counterclockwise slowly. Even on a cold engine, release it gradually to let any residual pressure escape before removing it fully. Pour the correct coolant in small increments, checking the level against the MAX line each time. Stop when the fluid reaches MAX. Replace the cap and twist it clockwise until it clicks or seats firmly.
Start the engine and monitor the temperature gauge
Start the vehicle and let it reach normal operating temperature, which typically takes three to five minutes of idling. Watch the dashboard temperature gauge. It should rise to its normal mid-range position and hold there. If it climbs toward the red zone or the low-coolant warning light stays on, turn off the engine and do not drive the vehicle. Have it inspected by a qualified mechanic before operating it again.
Check for leaks and record the service
After the engine cools again, recheck the reservoir level and inspect the ground beneath the vehicle for puddles of brightly colored fluid. A one-time low level after many months is common due to minor evaporation. A level that drops repeatedly within days or weeks points to a leak in a hose, the reservoir, the radiator, or the water pump. Log the date and the amount of coolant added in a simple notebook or phone note; this record helps a mechanic assess whether a pattern is developing.
When to stop and call a mechanic
A top-up solves a low level. It does not fix an underlying problem. Take the vehicle to a qualified mechanic if you notice any of the following: the level drops noticeably within days of topping up; you see a puddle of colored fluid on the ground; the temperature gauge reads higher than normal during ordinary driving; or the coolant looks brown, rust-colored, or has an oily film, which can indicate a head gasket leak allowing engine oil into the cooling system.
Coolant maintenance fits into a broader annual rhythm. A year-round car maintenance schedule can help you track when each fluid check, flush, or inspection is due so nothing is overlooked.
Read your owner's manual first
Coolant formulas vary by manufacturer. Some vehicles use orange OAT (Organic Acid Technology) coolant, others use green IAT (Inorganic Additive Technology), and many modern cars specify a specific extended-life formula. Using the wrong type, or mixing two incompatible types, can degrade corrosion protection and shorten the life of hoses and the water pump. Your owner's manual will state exactly which coolant is approved for your vehicle.
The content on this site is for informational purposes only and is not a substitute for professional advice. Always consult a qualified professional for guidance specific to your situation.